Call Now
(951) 680-9595


This is an in-depth guide on prepping your GX 460 front-end for the FBGX-01 aftermarket off-road bumper. It requires modifying your front end, but if you follow these instructions you have nothing to fear!
Tools Required
Skill Level & Time


Begin by opening all pieces included and inspecting them prior to install. If you are missing any components or have any questions prior to your install, please contact the company the item was purchased from.

Open the hood to the vehicle and start by removing the chrome accent on the grill. This does not have to be removed, but it does make the cutting process easier. You will need to remove the two 10mm bolts on top and the small phillips head screws about halfway down the grill.

The chrome insert should pull away from the grill by pressing down the small clips.

Unplug the factory fog lights and the four sensors leaving the lights and the sensors in the bumper. Secure the wiring up and out of the way to prevent any damage during install.
Once all items are unplugged, you are ready to mark for cutting. We used a expo marker and masking tape. Using these images below as a guide, mark your bumper. Using a sharp razor blade or cut off wheel slowly cut the fascia of the bumper.


Once bumper is cut, replace the chrome insert. Remove the factory crash bar from the four bolts on each side of the frame (Not shown in image). Keep the factory hardware since this will be reused.

Note: We added ¼” trim edging to our cut edge. This can be purchased at most auto parts store, however this is optional.

Using the factory 14mm head, loosely mount the two winch plate mounts. With the two brackets in place, loosely attached the winch plate to the two main brackets using the provided M12 hardware.

Install the skid plate mounts next. These will use the same M12 hardware. The bolt that attaches to the winch plate will be through-bolted, however, the other bolt will thread directly into the frame.


If you are going to run a winch, now is the time to install it. Tighten winch down until secure.
Note: This bumper was designed to use a “Hawse” style fairlead. Most synthetic rope winches will come with them; however, steel breaded winches will need a steel Hawse fairlead to be compatible.

Remove the grille from the center section using an 8mm socket/wrench and a #3 allen wrench. This will remain off the center section for majority of the install. We ship this installed for safety of the grille during transit.

With the grill removed, install the center section loosely using the M12 provided hardware.
Note: We have included an optional light bracket. This can be mounted on the front most bolt for the center section as shown.

Next you are ready to tighten down all the current components. We used a floor jack and raised the center section until the winch plate brackets were straight. These were tightened down and secured.
Next, secure the six M12 bolts that attach the winch plate to the brackets. Then you will move to the skid plate brackets.

Lastly you will secure the center section. Ensuring the center is even between the chrome accents. Lift up and push back as far as the center section allows and secure the six M12 bolts in place.

Once the center section is completed, we will move to the wings. The factory lights are utilized. These are simply removed by the single 10mm bolt in the middle of the light. Use this same bolt to attach to our bracket. Once the light is in place, use the provided M6 bolts to secure the light/bracket combo in place. With light pressure, push the bracket and tighten down and secure in place.

The sensors are easily removed from the factory bumper by twisting them out. The sensors are fragile, so we recommend taking time on removing stubborn ones. Ensuring the sensors are in the same location as the factory bumper, place them into the bumper and secure using the small arm attached. Secure with #3 allen head wrench.

Using the provided cut foam, adhere foam to wings as shown.

Secure wings into center section using the M12 provided hardware. This is much easier with a second set of hands. Once wings in place, check to ensure bottom of wing and center section are flush, and the end of the wings is aligned with the wheel well. Secure into place and repeat steps 12-14 on opposite side.

Next, using the provided M10 hardware, attach the wing support on the driver side to the frame as shown. Leave these very loose. Using M12 bolts, pull bracket to the bumper and secure. This will be tight and may seem incorrect at first, but it is designed to use tension. Secure all points down.
The passenger bracket will be installed the same way, however, to prevent damage to the windshield reservoir Place the bolts in so that the threads are facing the front of the vehicle.

Using a 15/64 Drill, drill through the hole in the top of the center section into the grill. You can use the provided M6 button head allen bolts to secure the grille to the bumper.
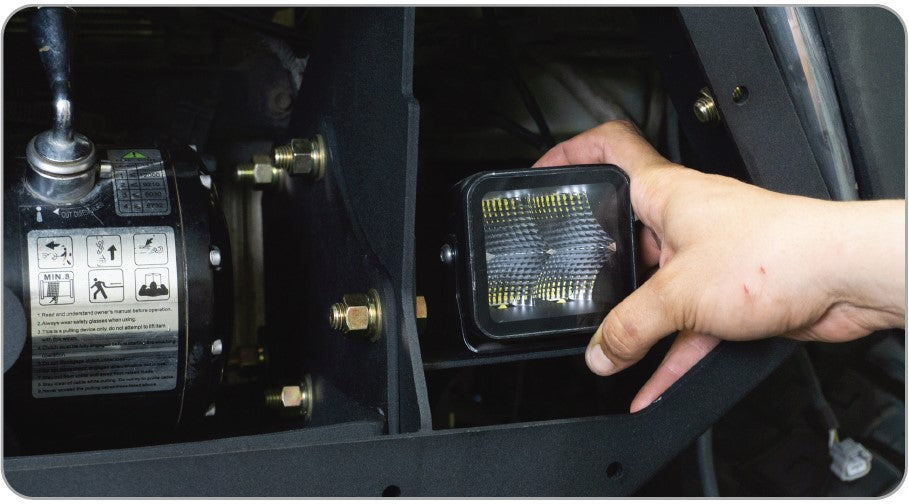
Optional Step: If utilizing our light brackets, install lights at this time.
Install the center sensors onto the grill the same as the wings.

If running a winch, install the fairlead first. You will use this to help align the grill onto the bumper.

Using the provided hardware, install the grill onto the bumper and secure.

Lastly, install the skid plate. Using the provided M12 bolts, secure the front three. The rear two M12 will be tightened with the provided nut and washers. Lastly, use the two provided M6 hardware to attach the two rearmost holes in the skid plate. Not all the holes in the skid plate are used as some are ventilation and drain holes.
Crack open a cold one and celebrate, you are now done with the install of your new DV8 Lexus GX 460 Front Bumper!

Leave a comment